CloudFormation
Step 1: Create a CloudFormation File
You can create a .yaml or .json file, for example: Athena-Workshop.yaml.
AWSTemplateFormatVersion: "2010-09-09"
Description: "CloudFormation template to create an S3 bucket and Athena Workgroup"

Resources:
  AthenaS3Bucket:
    Type: "AWS::S3::Bucket"
    Properties:
      BucketName: "my-athena-data-bucket"

  AthenaWorkGroup:
    Type: "AWS::Athena::WorkGroup"
    Properties:
      Name: "MyAthenaWorkGroup"
      WorkGroupConfiguration:
        EnforceWorkGroupConfiguration: true
        ResultConfiguration:
          OutputLocation: !Sub "s3://${AthenaS3Bucket}/query-results/"
Step 2: Deploy the Template in AWS CloudFormation
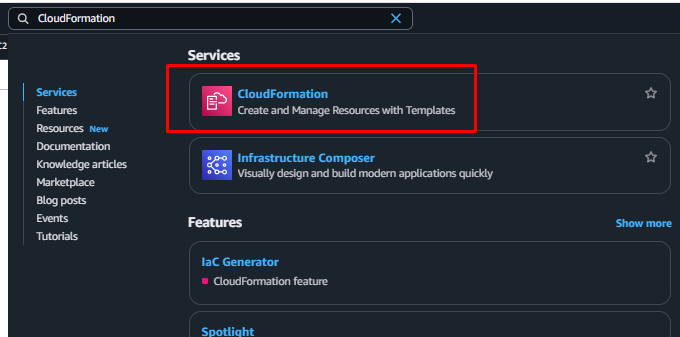
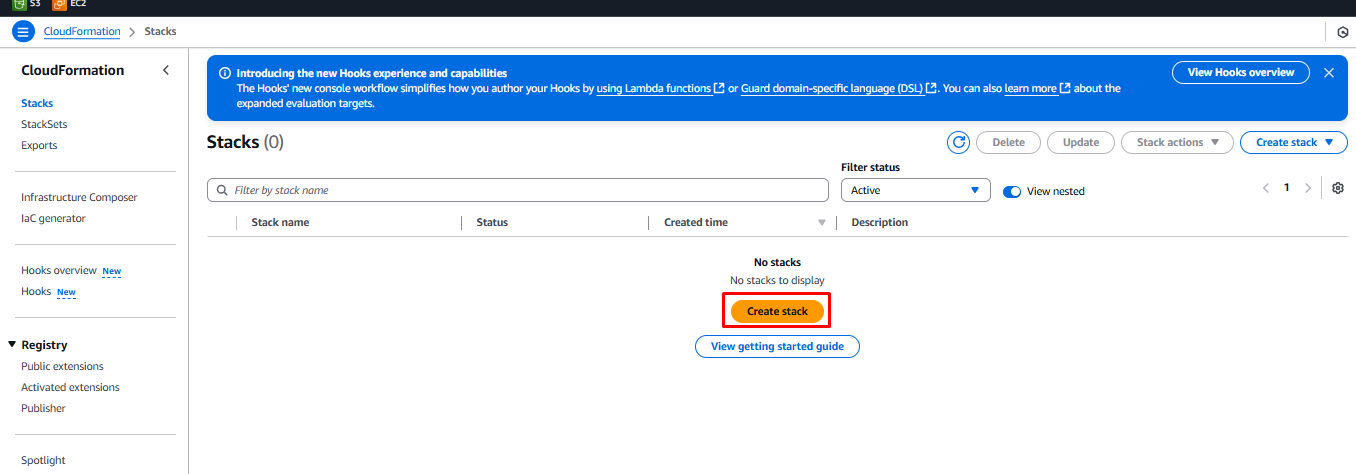
- Open AWS Console → CloudFormation
- Click Create Stack → With new resources (standard)
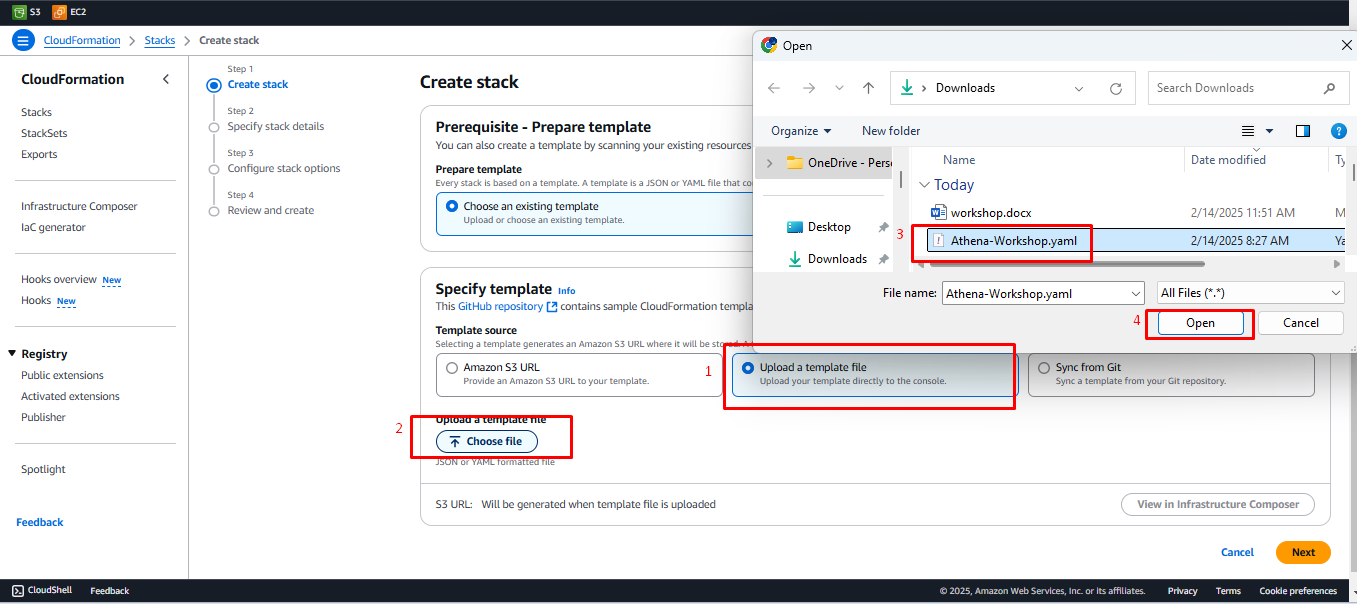
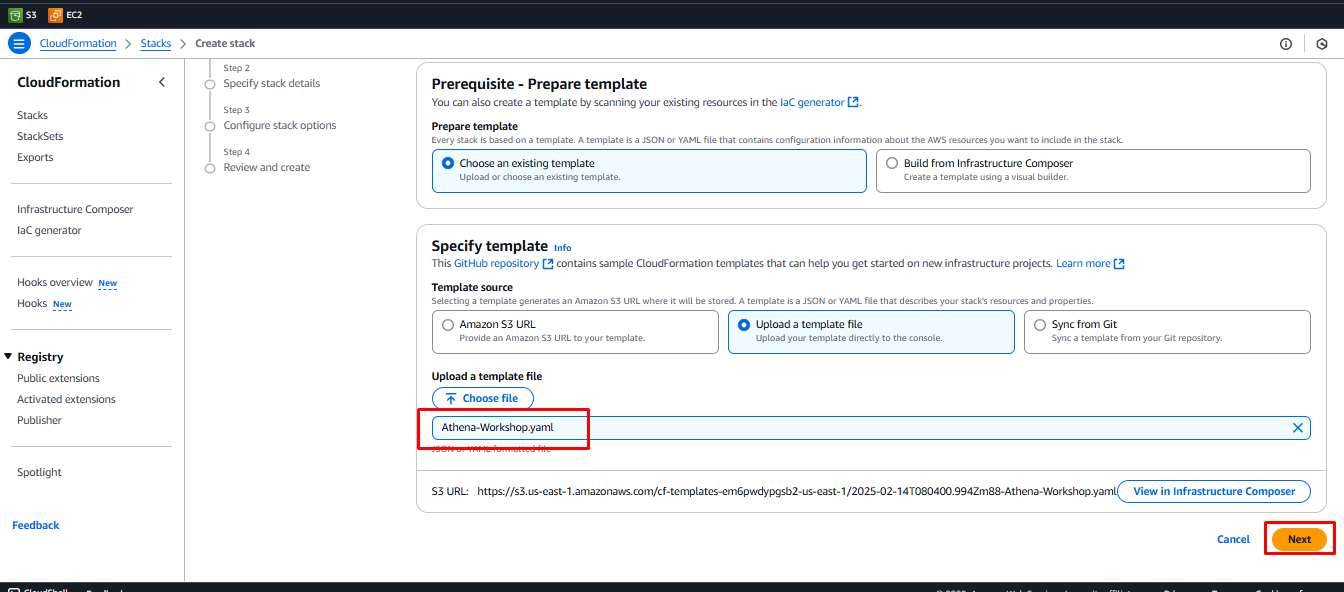
- In the Prepare template section, select Choose an existing template
- In Specify template, select Upload a template file, then click Choose file and upload the
Athena-Workshop.yamlfile, then click Next
- Enter a Stack Name, e.g.,
athena-workshop, then click Next
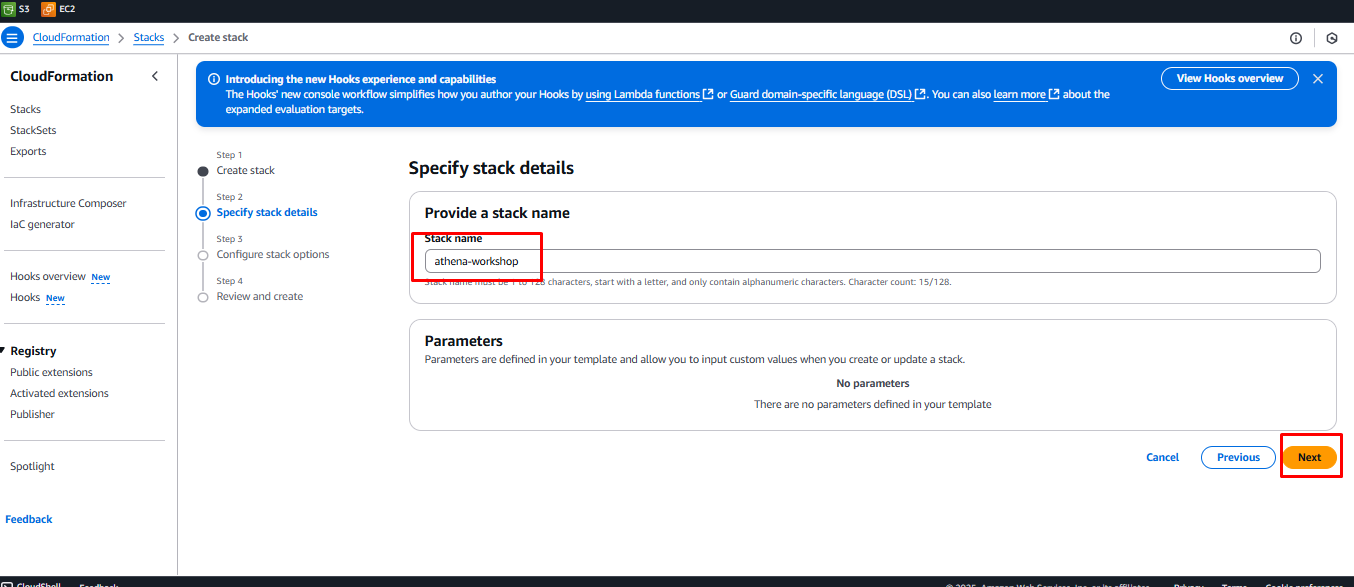
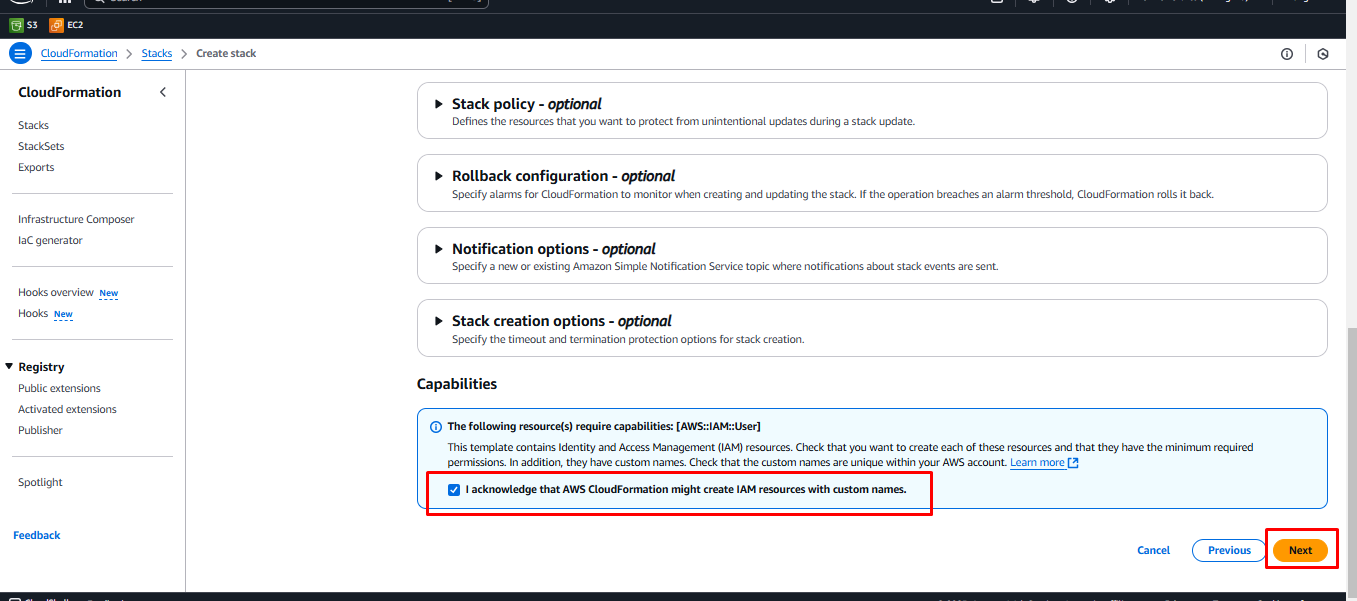
- In Step 3, under Capabilities, check I acknowledge that AWS CloudFormation might create IAM resources with custom names, then click Next and keep the default settings
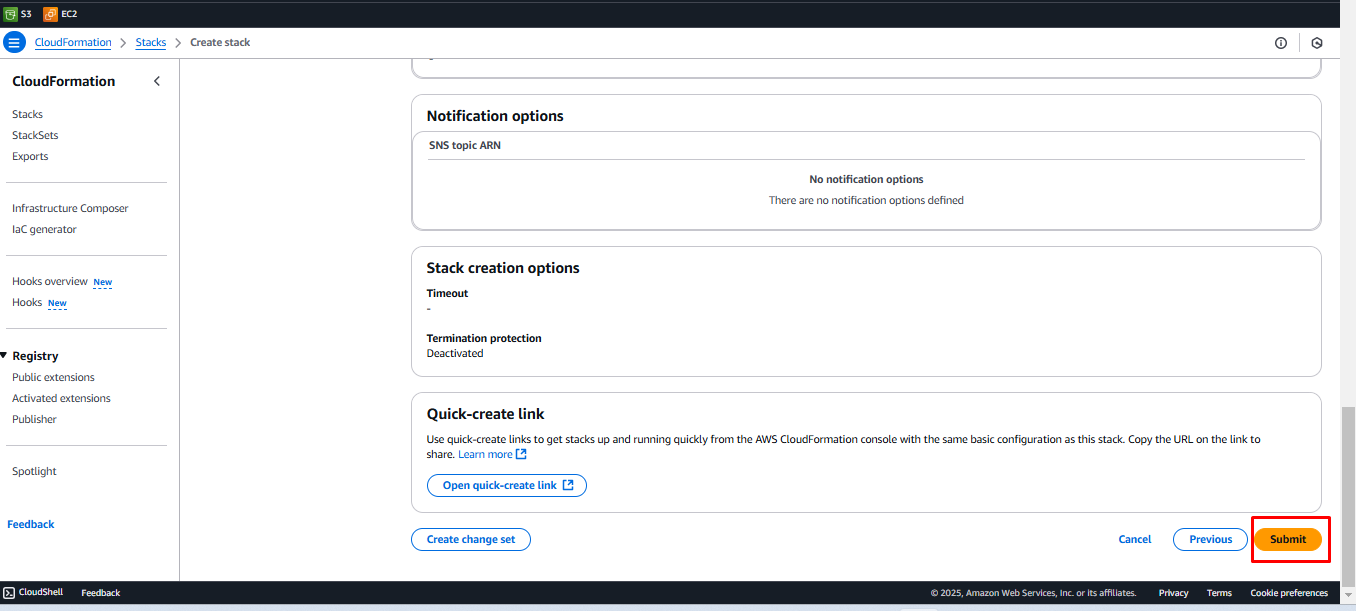
- Click Submit and wait approximately 5 minutes for CloudFormation to complete resource creation
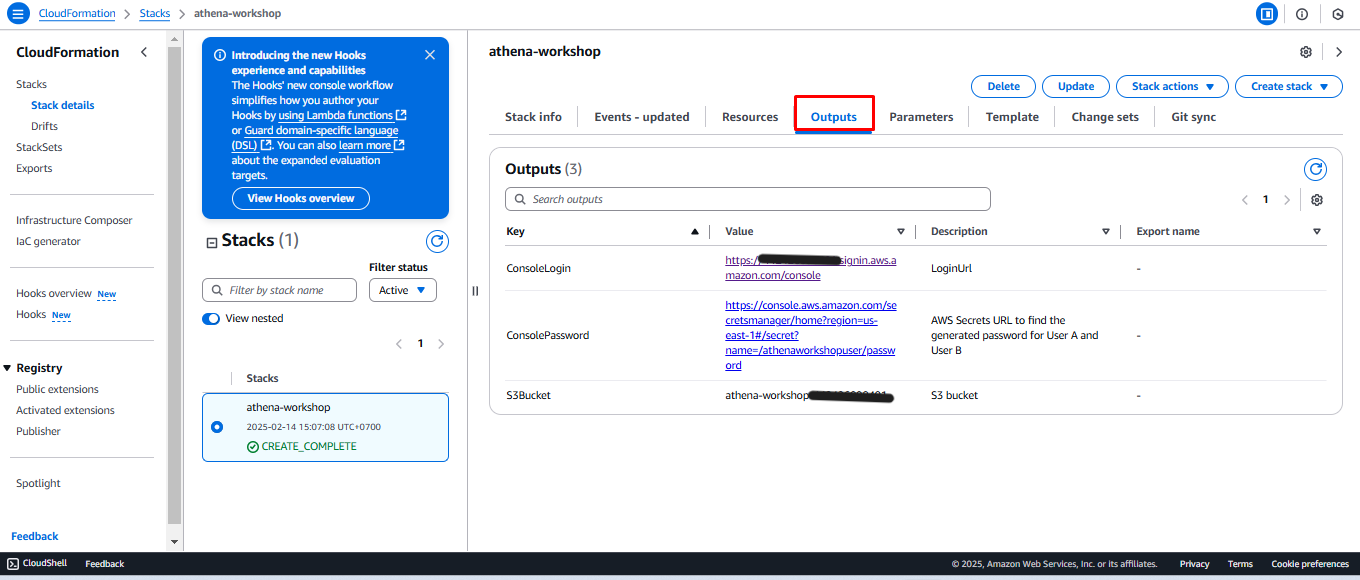
Step 3: Verify Created Resources
- Open AWS CloudFormation console and check for the CREATE_COMPLETE status
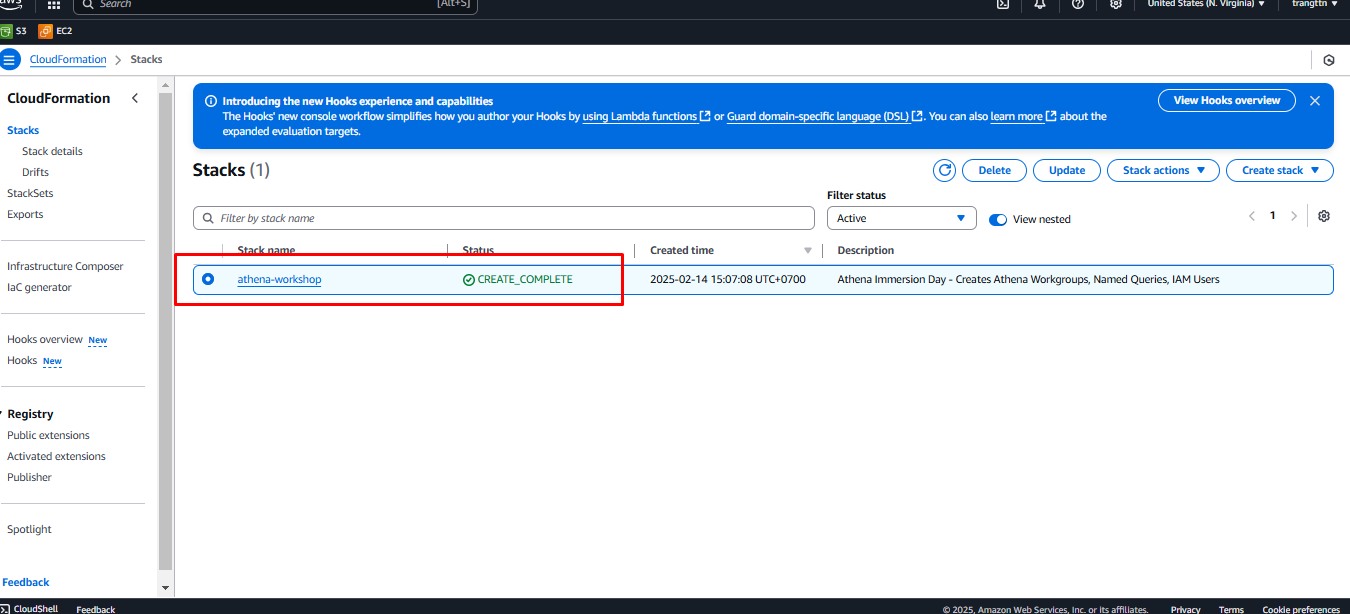
- Click on Athena Basics Stack, then navigate to the Outputs tab to find the S3 Bucket Name
- Recommended region:
us-east-1(N. Virginia), but you can deploy in other regions if needed. - Do not change any default database parameters in CloudFormation.